


Deprecated: Function create_function() is deprecated in /home/erikzcbg/public_html/mamitales.com/wp-content/plugins/related-posts-by-zemanta/init.php on line 183
Deprecated: Function create_function() is deprecated in /home/erikzcbg/public_html/mamitales.com/wp-content/plugins/related-posts-by-zemanta/init.php on line 183
 To celebrate the Day of the Dead in Mexico we create altars with different elements, based on an ancient prehispanic tradition. Reading more about the origin of the celebration I came to learn that it was originally celebrated in August, at the end of the corn, squash, chickpea and bean harvest. The Day of the Dead Bread is based on a rite performed by the first inhabitants of Mesoamerica when they would bury the dead with their belongings. They would also place with the deceased a bread made with amaranth seeds, toasted and ground, mixed with human blood let for sacrifices done to honor Izcoxauhqui, Cuetzaltzin or Huehueteotl. When the Spaniards conquered Mexican soil they forbid the making of such bread, but instead tried to morph the tradition by making bread with wheat flour and red sugar, in the shape of a heart. The Spaniards also moved the celebration to November, to coincide with the Catholic Day of All Saints Day (November 1st) and All Souls Day (November 2nd). In both faiths, catholic and prehispanic, death is considered a continuation of life.
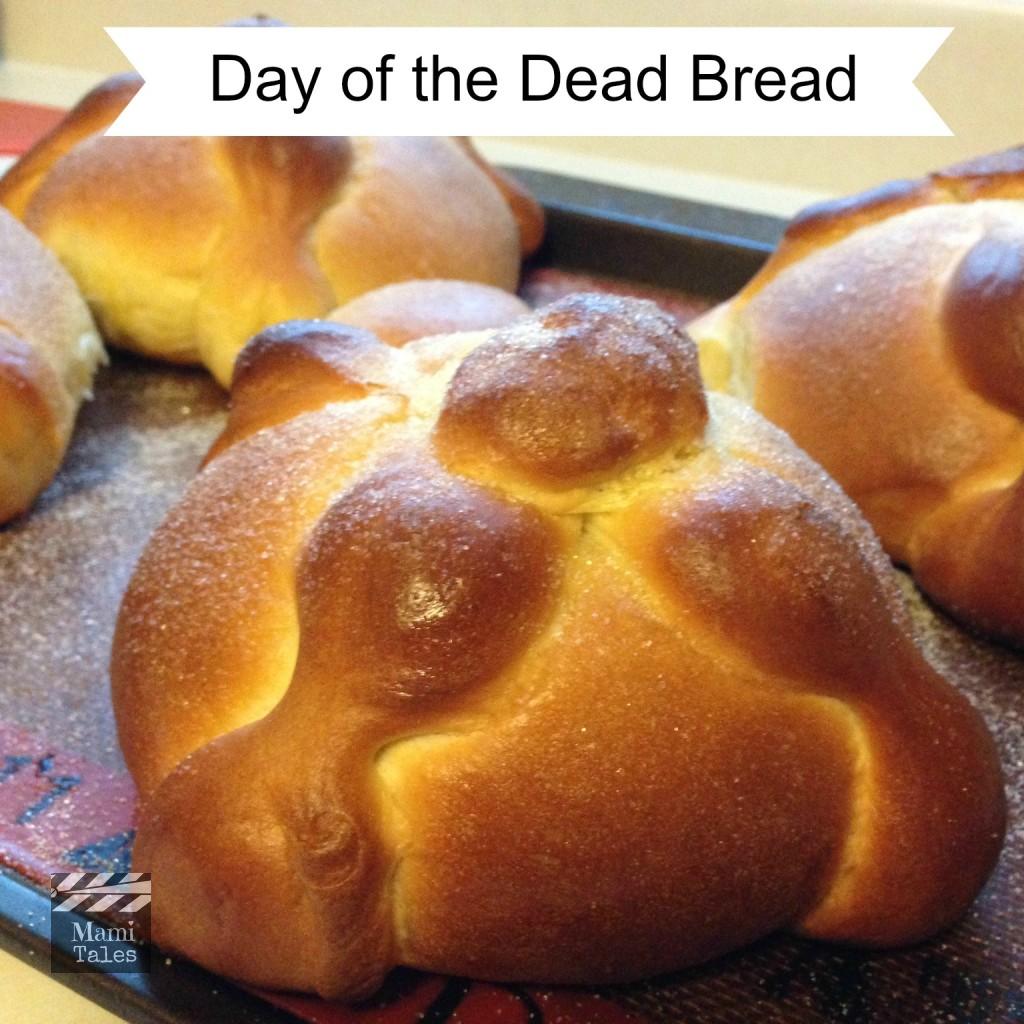
Nowadays the Day of the Dead bread is an essential part of any offering. The little ball on top represents a skull, and the “bones” to the sides represent the four cardinal points and the four extremities.
We celebrated the Day of the Dead remembering those from our family who are no longer with us, and whose memory and love with be with us always. It is customary to leave some things that they liked in life for them as offerings, so we honored my Grandpa Armando, with a cup of coffee and an apple; my Grandma Mutti and Grandpa Vati with a Gingerbread house and hot chocolate; my Godmother Aunt Maud with a bar of the finest dark chocolate; and Opa and Great Uncle Gino with a wonderful bottle of red Wine and a couple of glasses for them to toast. Miss I asked if they had come to have their offerings… and I’m sure they did.
This year, for the second time, the altar included a Day of the Dead Bread I made. Last year’s recipe was fine, but not amazing. This year a childhood friend of mine recommended following the recipe of Yuri de Gortari, a Mexican food historian who is striving to preserve the traditions and cuisine of Mexico, and the result was phenomenal.Thank you, Ana Elena!
 My daughter took a piece to school to share with her teacher and a couple of her friends, we shared it with some friends and ate it ourselves… the four loaves didn’t last two days! Here’s the recipe in English, and a video of Yuri de Gortari making this bread and bean tamales, if you’d rather watch how it is done.
- ½ oz dry active yeast
- 17.5 oz bread flour
- 5 oz white sugar
- ½ tsp table salt
- 2 large eggs
- 3 oz unsalted butter
- 8 oz milk
- Grated peel of one orange
- 1 tsp vanilla or saffron water
- In a small bowl, place 2 tbsp of flour, 1 tsp of sugar and the active dry yeast. Add a splash of warm milk creating a thick but watery mix. Leave in a warm place for it to double in size.
- Place the flour, half the sugar and the salt and make a well in the middle of it.
- Place the softened butter and the orange peel in the middle of the well and integrate with your hands or the hook attachment of an electric mixer.
- Add the milk, at warm or at room temperature.
- Add the eggs and mix thoroughly into an even dough.
- Add the rest of the sugar and the vanilla and keep kneading.
- Once your yeast sponge has doubled, add it to the prepared dough, and knead thoroughly for several minutes, until it doesn’t stick to your fingers anymore and you can perform the pane test with it – stretch it and see if it forms a thin film of dough without breaking. If it sticks to your fingers, add more flour... just enough so it won't stick.
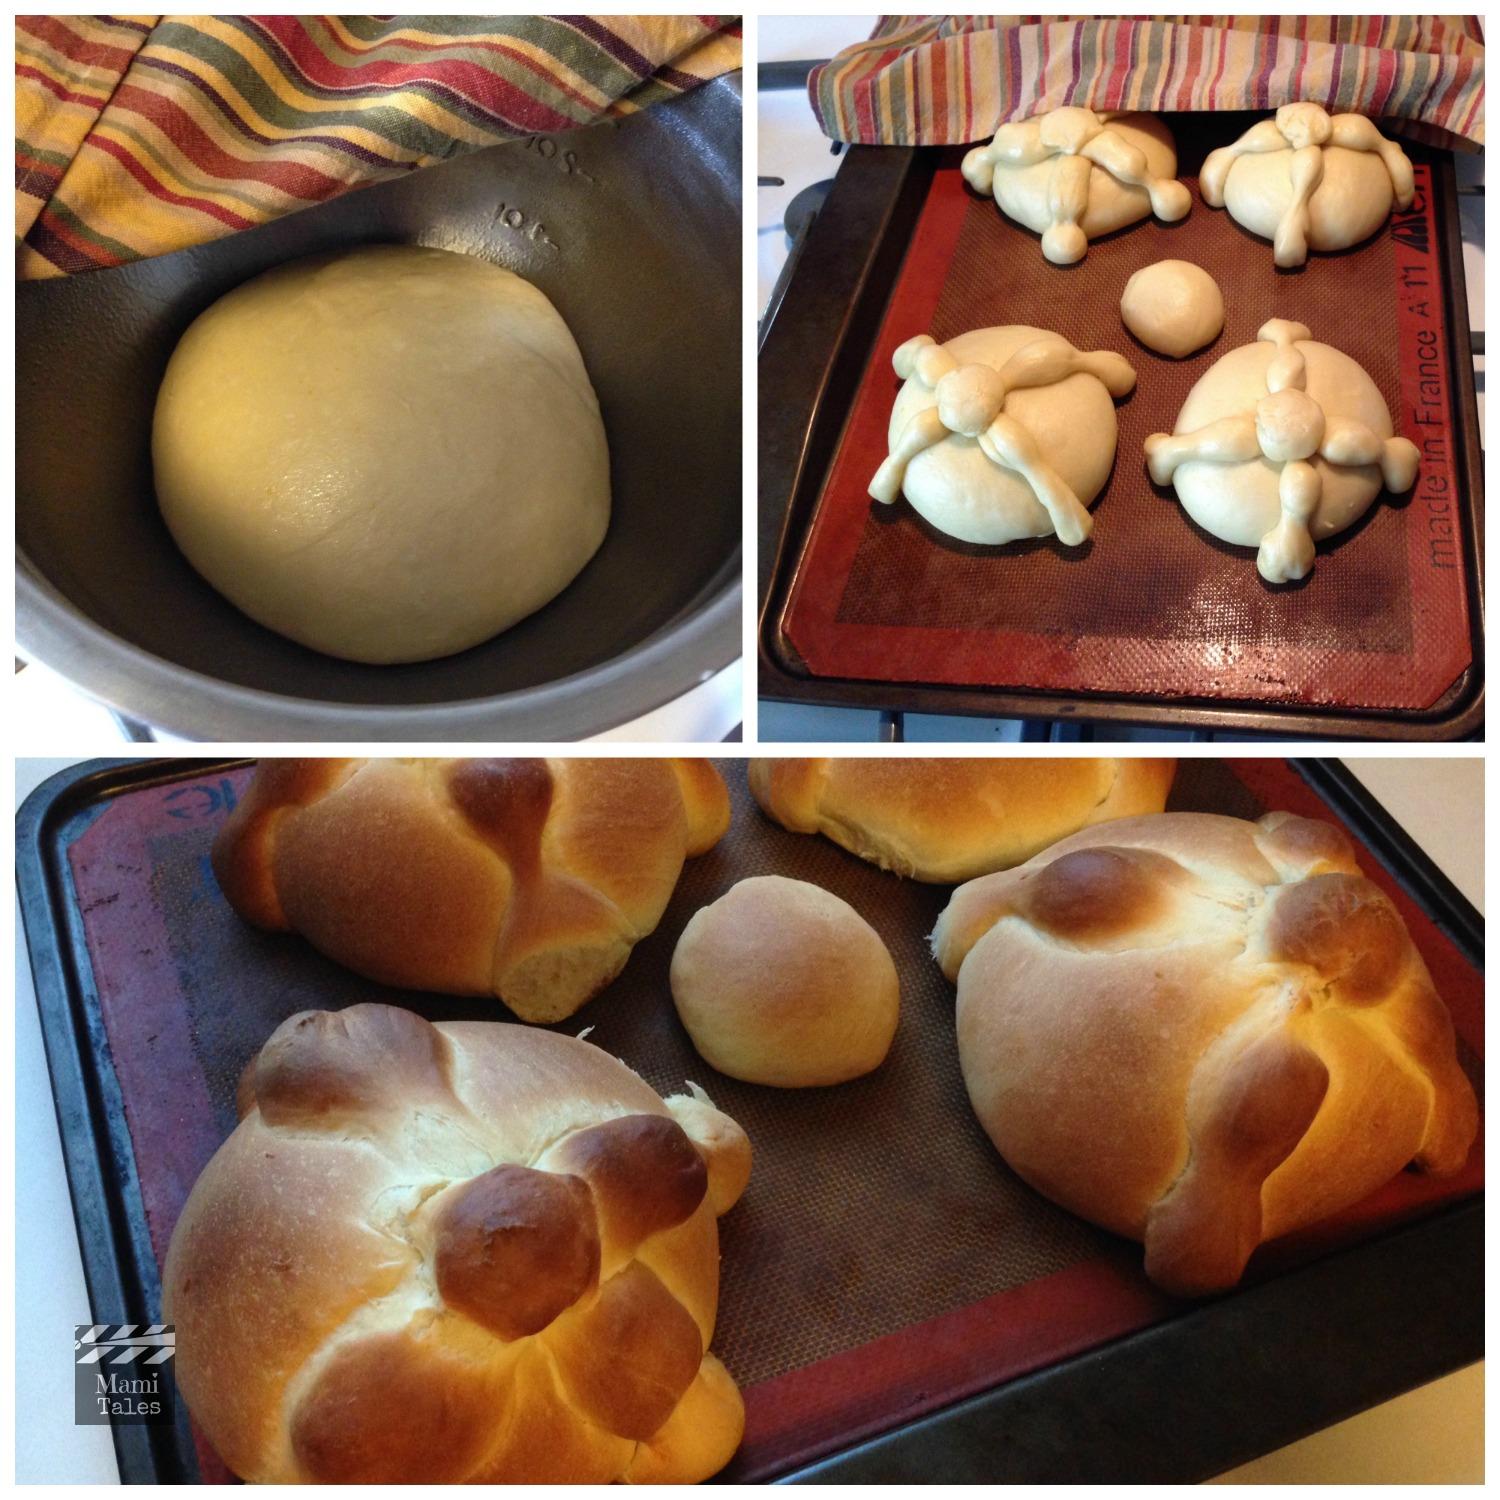
- Let it rest in a pre-greased bowl, covered with a damp towel. I used coconut oil spray.
- Place in a warm place and let it double in size.
- Preheat your oven at 350 F with the rack in the middle of the oven.
- Lightly knead the dough on a flat and lightly floured surface and divide in 5 equal portions.
- Knead 4 portions into little balls using your cupped hand and fingers as a cage to create the shape of the breads. Place the breads about 2 inches apart on a large cookie sheet lined with parchment paper or silicone mat.
- Using the fifth portion, break it down in 12 equal pieces and create the “bones” of the bread using your open hand rolling back and forth. That will make a string of 4 little balls with thin pieces of dough holding them together. Place two of these making a cross on top of your bread. Use a piece of dough and form it into a ball, to top the bread and cover the place where the X of “bones” meet. Repeat with the other 3 breads.
- Whenever you finish, place the sheet on top of the oven and let the bread double its size again.
- Once the dough has grown enough, place in the oven and bake for about 20 minutes, until the exterior is nice and golden.
- Take out of the oven and brush with melted butter. Sprinkle with table sugar to serve.


I love this tradition. Maybe I’ll do it next year if I remember. I watched the video too. Love it. That bread looks so delicious!
So glad you enjoyed the post! It is a beautiful way of remembering those we love, and making sure their memory will live with us. Thanks for reading!